My JTech’s New File Attachment Tool


How to use the My JTech file linking tool:
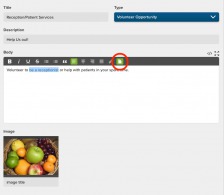
1. You can create links to files using My JTech in any of the area fields with a toolbar. Select the text you wish to use as a link to the file. If no text is selected, the file will be attached where your cursor was positioned and the text of the link will appear as the file name.
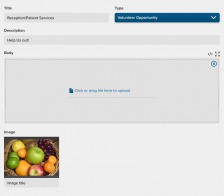
2. After your text is highlighted, click the file icon — the rightmost icon of the text area’s grey toolbar. Clicking the icon temporarily replaces your text input with a file upload area. You can either click the link to upload a file with the standard file picker dialog, or you can simply drag and drop your file directly into the file upload area.

3. When you’re done creating or editing the record, just click ‘save’ or ‘create’ and that’s it! Visit your website to see the new link to your file. In the image above, you can see the resulting file link on Estes Park’s website.
This great new tool is available for you to use right now. If you have any trouble or questions, there is a useful help article located in the support area of My JTech, or contact us and we’d be happy to walk you through the steps.

